Goal (Terminal Objective):
Students will learn about the Polish art of Pisanka, the art of decorating eggs.
Objective:
Students will make a decorated egg using a traditional Polish design.
National Standards:
Visual Arts Grades 5-8 Content Standard 1: Understanding and applying media, techniques, and processes
Visual Arts Grades 5-8 Content Standard 4: Understanding the visual arts in relation to history and cultures
Visual Arts Grades 5-8 Content Standard 6: Making connections between visual arts and other disciplines (Students compare the characteristics of works in two or more art forms that share similar subject matter, historical periods, or cultural context. This lesson can be integrated into a history lesson of multicultural studies that connects the historical correlation between Ukrainian Egg Design, Russian Egg Design, & American Easter Egg Designs.)
Purpose:
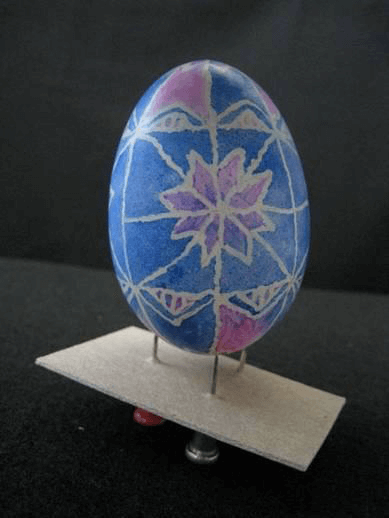
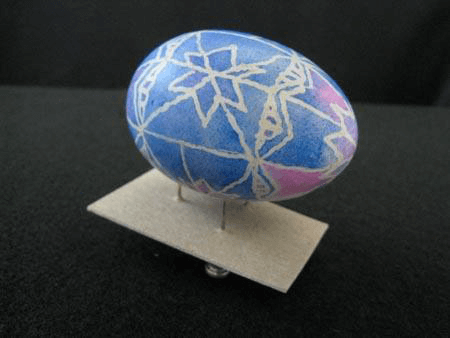
Students will learn about the Polish art of Pisanka or Pisanki (plural). The art of decorating a chicken, goose, or duck egg originated as a pagan tradition, but was later turned into a Christian tradition of decorating eggs during the Easter Celebration. Pisanki symbolizes the revival of nature and the symbolism of the Christian’s belief in the resurrection of their savior.
The art of decorating eggs is also found in Russia, where Czar Alexander the III commissioned Peter Carl Faberge to make an enameled egg design for his wife as a gift for the upcoming Easter holiday.
New Vocabulary:
“Polish Pisanka (plural pisanki) is a common name for an egg (usually that of a chicken, although goose or duck eggs are also used) ornamented using various techniques. (Wikipedia)
Materials:
Boiled or hand blown eggs, hard pencil, thumb tacks, scrap cardboard or matt board pieces, Q tips, paper towels, and the following Sargent Art Products:
 #22-9099 Washable glitter Watercolor Magic
 #22-6010 Washable Watercolor Magic
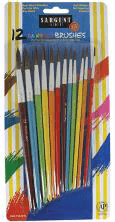 #56-6012 Natural Hair Rainbow Brush Assortment
 #98-8916 6 jar tray Paint Storage Tray
Time:
Two 50 minute classes
Introduction and Motivation (Set):
Hang the Polish map and the Polish Eagle posters in the front of the room. Hold up the flag and ask anyone if they know what country it represents. Pass the Polish Flag around the room for students to look at. Ask students if anyone knows if anyone from their families is Polish.
Explain that we will be making art today that originated in Poland. If a world map or a globe is available, have a student identify where Poland is located. Hang the Pysanka Poster in the front of the room. Ask students if the poster reminds them of anything. Pass the collected prints from Poland and the pictures of places in Poland around the room. If the teacher prefers, the prints can be hung on a bulletin board in the room.
Instruction:
The teacher will demonstrate to students how to apply the wax on the egg. The watercolor will “resist” the wax, and the area that the wax occupies will remain white.
Activities:
There are two ways a teacher may go about teaching this lesson. Teachers can boil eggs ahead of time for their class to use.
OR
(1) Guided Practice:
-
- Pass out eggs and disposable bowls/cups to students.
- Demonstrate to students how to use a large long needle and poke a hole in both the top and bottom of the egg.
- Holding the egg over the bowl, blow into the egg. The yolk must be pierced in order for it to be blown through the hole on the other side of the egg. If the egg doesn’t come out, reinsert the needle and poke a few more times to make sure the yolk is broken. Keep at it, this can take 15 minutes! The key is to keep blowing and poking into the egg with a needle!
- Have students blow out their eggs.

Poke hole in egg using 
Blow hard into the 
Egg is draining. thick needle. - Give students small 4” x 4” cardboard pieces and have them poke three thumb tacks into the cardboard to form a triangle. This will be used as a stand on which to rest the egg while it is drying.
- Gather the students’ attention again and show students how to use the kistka to apply the wax on the egg. The end of the kistka is heated above a small tea light candle flame. Next, dip the tip of the funnel (top side) into the beeswax. Now heat the tip of the kistka with the candle flame. Touch the tip of the kistka to the egg and glide it across the egg’s surface to trace over the pencil lines of your design

1.Heat funnel end.

2.Scoop up wax.

3. Draw wax over pencil lines

4.When wax stops drawing, reheat tip of funnel, if the wax doesn’t draw, then you need to refill the funnel with more wax, repeat steps 1 & 2.
- Demonstrate to students how to apply the liquid watercolors on the areas of the egg that have no wax applied to them.

1. Apply 1st color.

2. Apply 2nd Color
(*Note, students can use as many colors as they want.)
- Let the egg dry. You will use the cardboard stand to dry the eggs on.

3.A Qtip can be used for blending of colors.

4.Hold the egg next to the candle flame to melt the wax.

5. Use a paper towel to remove the

6. Finished Pisanka! wax after the wax has been heated.
- Remove the wax from the egg. Hold the egg near the tip of a candle flame for a few seconds. Then remove the wax by wiping away it away with a paper towel.
- The egg can be varnished with a high gloss polyurethane, by rubbing a few drops onto the egg. Latex glosses will smear the dye, so don’t use them!
OR
This is a little easier for teachers:
- Have students copy some of the traditional Polish Pisanka designs on to their eggs freehand. This can be done by using a paintbrush using the liquid watercolors.
(2) Independent Practice and Check for Understanding:
Teacher facilitates the application of wax onto the eggs. Breaking the class up into small working groups will help in the classroom management of this project and also in ordering just a few kistkas for students to work with.
(3) Closure:
Have a class critique of the eggs. Display the eggs somewhere around the school.
Evaluation:
Teacher will evaluate the works individually based on the following criteria:
Level One - Student successfully blew out an egg; completed a pisanka using a kistka, properly applied the wax, and successfully copied one of the Polish pisanka designs.
Level Two - Student successfully blew out an egg; completed a pisanka using a kistka, properly applied the wax, and tried to copy one of the Polish pisanka designs with moderate success.
Level Three - Student completed a pisanka using a paintbrush and liquid watercolor and successfully copied one of the Polish pisanka designs.
Level Four – Student completed a pisanka using a paintbrush and liquid watercolor. Little evidence of a duplicated Polish design is present.
Extension:
Students can learn how to batik on a piece of muslin as an extension of this project and the uses of wax and its role in creating works of art.
Resources:
Wikipedia:http://en.wikipedia.org
www.polartcenter.comsuggested resources used in this lesson: Poland Desk Flag, Book: Easter Eggs Polish Style & Two Hundred and One Egg Patterns, Pysanka Poster, Map of Poland, Miniature Matted Prints of places in Poland, Polish Eagle Poster, Polish Folk Culture Calendar,
Polish Calendar of Beautiful Towns, Castles & Palaces of Poland Calendar
www.yevshan.comsuggested resources used in this lesson: Pysanka Mini Kit #1, Pysanka Deluxe Kit #3, 2 Floral Wooden Pysanky, Elaborate goldtone pysanka stand, Kosiv Painted Wooden Pysanky, Kosiv Wooden Pysanka Basket, Genuine Handmade Pysanky
Art Consultant